Sunday, December 30, 2012

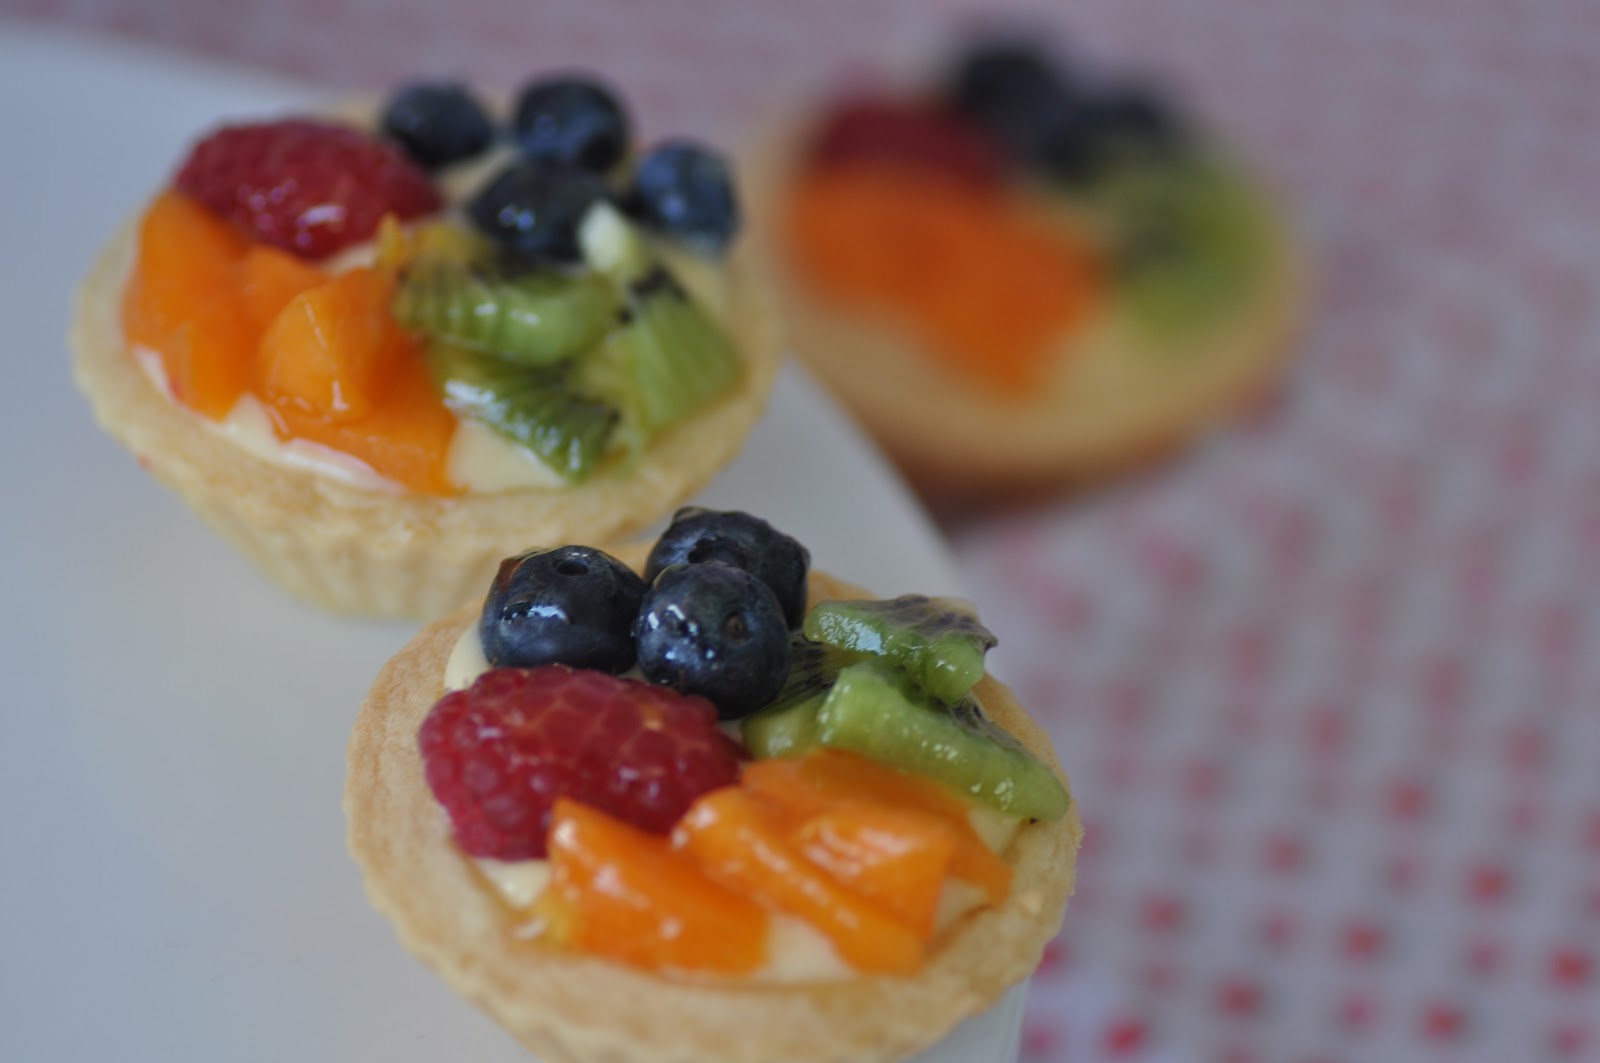
Fruit Tartlets


I am on a serious blogging roll tonight! After many months of silence, it's like you can't shut me up!  I figure that now I have the time (and motivation), I am going to keep posting until I run out of material, and fortunately for you followers, I've almost run out of material for the meantime!

Funnily enough, I've never made a fruit tart before.  I've made the different components that go into a fruit tart several times, namely, sweet shortcrust pastry and vanilla creme patissiere, although usually when I happen to make the two together, I make little mini cupcake size tartlets and top it off with a single hulled strawberry as that is all that will usually fit on it.

Given all these fruits are in season and they all happened to be stocked in our fridge, I decided to put these on the afternoon tea menu.

I love the array of colours, the vibrant red of the raspberry, orange from the apricot, green from the kiwi and the blue from the blueberries.

Of course, the apricot glaze makes these colours glisten beautifully!  
Fruit tarts are best eaten immediately as the pastry cream really softens the tart shell.  As these had been sitting out at room temperature for a bit, unfortunately by the time I bit into it, this was a goopy mess.  But they were still tasty in my opinion!


Passionfruit Mousse

So after the official afternoon tea function in October, I said to myself, never again!  That's not to say that it didn't go well, in fact, the compliments I received were really humbling and it couldn't have been more of a success! But it was the stress that got to me! Anyone who knows me, knows that I'm a natural stress head and perfectionist and being such an amateur baker, I have to admit I found the task, well, stressful! Let's just say, behind the scenes in the kitchen, you did not want to be near me! C can attest to that!

Just this weekend, a very dear and close couple to us came to visit from London.  They've been tracking the posts I put up on the blog and on facebook about my baking adventures and have always commented about wanting to sample a bit of sweet pea creations!! So it was only fitting that I took my afternoon tea out of early retirement! 

I am very pleased to say that this time around, the behind the scenes action in the kitchen were actually very boring! A sign that things were going smoothly and seamlessly! No stuff ups! Such a stark contrast to the last event!

Given the desserts in an afternoon tea are usually very sweet, I wanted to balance all the sweetness with a tart and light dessert.  I love passionfruit, so I attempted this passionfruit mousse.  I used the recipe from a blog by Daily Delicious (found here).  The recipe is very quick and easy, perfect when you're pressed for time!

The flavour was definitely there, it had what I think is the perfect ratio of tart to sweet.  Although I found that the mousse wasn't as light as I would have liked it - it was too gelatinous for me. 

All in all, I was very happy with this afternoon tea - it's exactly what I needed to give me inspiration to pursue a future in it!

Chocolate Christmas Log

Okay, so for those that have been following my blog, I am still alive and I have not abandoned my blog (not completely at least for the time being)! I cannot believe its been almost two months since my last post! How terrible of me!

That's not to say that I've not been baking! I have been, although since little girl's birthday extravaganza, it saddens me to say that baking has been a luxury I just don't have much time for these days :(  (and yes, baby girl is grown up and turned into a little miss).  I've recently gone back to work returning to my legal roots, and on top of trying to run two cafe businesses and juggling little girl, well, you can see why baking hasn't been high on the agenda!

So with the explanations done, belated Merry Christmas to all!!  I hope everyone had a wonderful Christmas catching up with family, friends and loved ones!

This year, we were adamant about keeping Christmas very low key! After last year's stressful Christmas, I wanted to keep out of the kitchen as much as possible on the day and I am very happy to say, I managed to do just that!  Well, I was responsible for making a dessert this year, which was the least I could do!

So I decided on this chocolate christmas yule log! It's a chocolate sponge, filled with whatever you like! Some recipes call for a chocolate filling (like ganache) although I decided to opt for a simple whipped cream.  And the log wouldn't be complete without the frosting on top (I used ganache) and a dusting of icing sugar!
To get the log texture, I ran a fork over the ganache, although you could easily leave off the ganache.  I am pleased that my sponge didn't crack, although I wasn't too fussed if it did as the cracks would have added a really nice log texture.

If you're adamant about not having the sponge crack, apparently the secret is to roll up the sponge using a tea towel as soon as it is out of the oven and let it cool while wrapped in the towel.  The tea towel retains the moisture.

I have to admit that a part of me is regretting that I did not embark on some crazy Christmas themed baking project like I did last year.  Although I did manage to bake some gingerbread men for our wonderful customers at the cafe and some red velvet cupcakes for my work Christmas party! But no crazy gingerbread house project! Oh well, there's always next year!

Merry Christmas all! xx


Sunday, November 4, 2012

Gateau Opera

Although it feels like it's been a while since I've written a post, the baking has been on like there's no tomorrow! Since the afternoon tea function (which I am still using to post entries about!), we had baby girl's first birthday party where I baked up a storm (more on that later) and this weekend feels like the first weekend I've had in a very long time to just catch my breath!
So this is a Gateau Opera with layers of joconde soaked in a coffee syrup, coffee buttercream and chocolate ganache.  I've made this many times before and it's always a winner so I just had to include this on the afternoon tea menu! Despite knowing how to make this, I have to say, I was not very pleased with how I assembled the cake.  I make one piece of joconde and then cut it in half cross sectionally which calls for a very steady hand.  Unfortunately, with so many other desserts to make, I was getting myself all flustered in the kitchen and my hands were far from steady, particularly as I was trying to rush through the mountain of baking, so each cross section piece came out very uneven!  It also didn't help that I was assembling one large cake and then cutting it into individual slices - I'm sure if I had used small individual moulds to assemble the cake, I think I I could have gotten each piece close to perfect. Oh well, next time!
I topped each slice with candied cocoa nibs which gave a nice textural difference to the cake.  I must credit C for the suggestion and well, he did make the candied cocoa nibs for me too!

This has to be one of my favourite cakes - coffee and chocolate is always a winning combination! Despite taking 3 to 4 hours to make, I would recommend people give this a try if you like coffee and chocolate!


Tuesday, October 23, 2012

Ispahan

I've always wanted to recreate Pierre Herme's Ispahan long before I even knew what they were! When we were living in London, I'd always see these little pink macarons filled with raspberries and they always caught my attention because they were the prettiest little things! I then had one at Claridge's afternoon tea and my love affair with macarons began! They were divine! So when I began my baking journey, the first thing I attempted were pink macarons filled with fresh raspberries.
 
When my macarons were failing me, I started troubleshooting on the internet (isn't google the best?) and that was when I discovered I was creating a mock Ispahan.  So what is the Ispahan? There are several versions, but essentially it is a macaron with lychee, rose and raspberry.  In Herme's book, the centre comprises of raspberry jelly surrounded by a rose and lychee ganache.  I omitted the raspberry jelly and used fresh raspberries instead because they're much more visually appealing!
 
I love fresh raspberries and despite them being so expensive at the moment, I put the Ispahan  on the afternoon tea menu as I just could not resist having them! They're just too damn pretty! 
Now I wasn't sure whether to admit this, but I have a confession to make - I still have not made a genuine Ispahan yet! :(   The problem was the rose and lychee ganache, it just ended up being a runny mess, not pipeable at all, despite refrigerating it and even letting it sit in the freezer!  That wouldn't do for the afternoon tea, so I ended up making up another batch of ganache, this time I put less lychee puree in the ganache.  Because the lychee flavour was so subtle, I omitted the rose essence as the smell is so overpowering I was afraid it would dominate the whole macaron.
After almost 48 hours of the rose and lychee ganache sitting in the fridge, it ended up becoming pipeable so I ended up using them with the leftover macaron shells!

So there you have it, the Ispahan in two separate macarons!


Thursday, October 18, 2012

Mini Profiterole Tower

OMG let me just say what a crazy CRAZY couple of weeks it has been! I am absolutely exhausted and that is an understatement! I've not been baking much these days, but baking is soon to be all I will be doing as I embark on a project to cater a whole afternoon tea function at our new cafe.  Yep, you heard right, I have an official booking for afternoon tea and yes, we have a NEW cafe! OMG!

So with our new cafe having recently settled where I have been working at these past few weeks, you can understand why baking and blogging have slid down the list of priorities.  But with the afternoon tea booking coming up VERY soon, I've had to make time to practise some creations.  This is my first official function and I want it to be absolutely perfect!
 I've decided that I will put these little babies on the menu! Aren't they absolutely adorable? They're miniature profiterole towers, filled with whipped cream and glazed with a chocolate sauce.
It's really difficult to get an appreciation of how tiny these little babies are, so I placed them against a teacup and you can see how tiny they are.  Each profiterole only measures about 1-1.5cm, so each tower is only about 4cm high. OMG, so cute!   
I love being able to peel away each profiterole one by one, but its really not necessary as you can pop the whole thing in your mouth in one bite! But that would take the fun away from eating this! 
As one of the guests at the afternoon tea follows this blog, I've decided not to publish this post on my facebook profile until after the event, as I don't want to ruin the surprise for her and the other guests! I really hope I can pull this off - I have such nervous excitement building up in me! Fingers crossed! Who knows, maybe one day in the future, these afternoon teas will be a regular occurrence at the new cafe! That would be awesome!

Monday, October 1, 2012

Gingerbread House

I've struggled to find time to bake recently (explanations to follow in due course) so I thought I would re-hash an old creation of mine.

About 10 months ago, my blood, sweat and tears went into baking a gingerbread house in honour of baby girl’s first Christmas.  It was such a harrowing experience that almost a year has past and I still cannot bring myself to destroy the gingerbread house!

Baby girl would only have been around 4 weeks when I decided to embark on this mammoth task and anyone with a 4 week old baby will know exactly how wrecked you feel ALL the time, so embarking on a project such as this is really the last thing you would want to be doing!

Clearly, sleep deprivation had led me to not think straight as I seemed to have forgotten my last experience at baking a gingerbread house.  It was about 5 years ago that I thought, wouldn’t it be nice if I baked a gingerbread house for my niece’s birthday having absolutely no idea how involved it would be.  Having spent two days baking and decorating it, and also having used Pythagoras’ theorem for designing the tepee shaped house (who would have thought that would ever have come in handy, seriously who?), I said to myself, NEVER again! Particularly after the soul crushing experience of having my niece and her friends rip into the gingerbread house in a matter of seconds, leaving it to look like the aftermath of a hurricane (what was I expecting from 7 year olds - admiration from a safe distance? Yeah right)!

So with a bout of amnesia, off I went.  After SEVEN days, the gingerbread house was complete! The seven days consisted of firstly getting out the ruler and pen to measure a house, then baking two lots of gingerbread (I stupidly halved the recipe and then realised I required the FULL recipe - duh), and then about 5 days of decorating all while in a zombie like state. Needless to say, I was well and truly over it by the time I finished it!  

However, with the memories no longer so raw, I forget about all the pain that went into it and it makes me think that just like child birth, I could perhaps do this again!
As my piping skills weren’t great, I had to pipe and re-pipe the writing on the plaque so you can see the smears across it!
I must credit C as he designed the love heart made from musk sticks.
The back of the house.  The musk stick picket fence was also C's creation!
One side of the house. 
This was the last of the walls to complete and by this stage I just wanted to finish the darn thing and so I opted for the quickest solution and stuck two candy canes to the wall.  I ended up liking this side best!
 So what do you do with leftover gingerbread dough? Make gingerbread men of course!


Sunday, September 23, 2012

Pink Ombre Cake

Oh my gosh, I am absolutely in love with this cake! It is pink and it is pretty, and I love love love!

When I first saw an ombre cake, I thought they were so pretty that I decided that I would make one for baby girl's birthday! Well baby girl is almost turning one and over the weekend, we held a birthday cake smash for her with this pink ombre cake being the centre piece.

The idea behind the cake smash is that baby girl is meant to smash the cake into pieces (duh, it's exactly how it sounds)!  It's supposed to be fun and messy!  I had a vision of her getting her hands literally stuck into the cake with cake and cream all over her face and body and well, basically everywhere! It sounds so deceptively simple doesn't it! Well I never would have guessed in a million years that baby girl would be terrified of cake.  She would not go anywhere near it, let alone smash it!

So the cake smash didn't go to plan :( Unfortunately, we weren't able to capture photos of baby girl with a big grin on her face with cream all over her mouth and body as I had imagined.  Instead, we got photos of her sitting next to the cake crying and crawling away from the cake in terror!  Just as priceless!  

Her being so scared of the cake did solve my dilemma of being able to take a photo of a clean slice of the cake to show the beauty of the layers!
So the cake is a simple vanilla sponge cake (you can use any sponge recipe).  I used the Wilton rose colour to get the varying shades of pink although for the bottom layer, I added a touch of red in order to get it really dark.  In hindsight, I don't think I needed it.  The trickiest part of baking this cake is getting the colouring just right. 
So I divided my cake mixture into four bowls and added a little bit of colouring to each to get the varying shades of pink.  You always start with a little bit of colouring first as you can always darken it later.  So the second darkest layer you see was originally my darkest layer.  I had baked that layer first and when I saw how the intensity reduced having baked in the oven, I grabbed the lightest batter and went crazy with the food colouring.  I didn't intend it for it to turn out hot pink but I'm glad I did as I knew it needed to be really intense in order to distinguish the layers. 
I am really happy with how the sponge turned out.  Since I am not so great at trimming sponges to get it level, I was determined to get the sponge to bake evenly so I wouldn't get the dome you usually get in the middle of the cake.  I read that if you wet some old tea clothes and wrap it around the cake tin, that should help the cake cook evenly as it's always the sides that get cooked first (hence the dome).
 
I was so pleased it worked! So I didn't have to level the cake by cutting it! *happy dance* 
You can see in the top left corner where baby girl managed to just touch the cake!

As for the frosting, I used a plain Swiss meringue buttercream.  It's my favourite frosting (aside from cream cheese frosting).  Similar to the sponge, I divided the frosting into different bowls and gradually added a bit of food colouring, making sure that there was more of the lightest colour frosting as that would also cover the top of the cake.
I didn't really judge the quantity well as I ran out of the lightest colour frosting and ended up having to pipe a few swirls here and there with some of the darker colour frosting.
   
Not only is this cake so darn pretty, it taste darn good too! I absolutely love love love this cake!

Saturday, September 15, 2012

Pear Tarte Tatin

This is a simple tarte tatin made with puff pastry.  There's a bit of debate as to whether a tarte tatin should be made with a shortcrust kind of pastry and I can see why as the caramel really softens the puff.  But I think whatever base you use, the tarte tatin for me is all about the sweet caramel buttery pears (or apples or whatever fruit you choose).
The recipe I used is a Gordon Ramsay recipe which jazzes up the traditional tarte tatin by including additional spices (recipe can be found here) such as cinnamon and cardamon.  I included a vanilla bean as it goes so well with these spices.  
 
I'm not sure whether the tarte tatin is supposed to be so syrupy, in fact, I don't think it is, as it does ruin the pastry but I quite enjoyed it, particularly when eaten with vanilla ice-cream - yum!  I definitely will try this one again, perhaps with a different base, as the flavours were delicious.  Oh, and a tip if you're not a fan of the sogginess - use fruit which is firm, so here in Australia, I used the Packham Pears which are usually crunchier than the rest.  And you can prepare the pears (or apples) a day ahead, leaving them uncovered in the fridge - this helps to dry them out.